This article covers everything you need to know about refurbishing sash windows. It explains what sash windows are, the benefits of refurbishing them, and how much it typically costs. It also outlines the process of refurbishing sash windows, from assessing their condition to painting or staining them. Finally, it provides some tips for maintaining your refurbished sash windows.
Introduction
Wooden sliding sash windows are a traditional feature in British homes. But as they age, they can start to look tired and need some TLC. Refurbishing your wooden sliding sash windows is a great way to give them a new lease of life, and it doesn’t have to be as expensive or time-consuming as you might think.
Here’s our complete wooden sliding sash window refurbishment guide, including an overview of the process and how much it’s likely to cost.
What is Wooden Sliding Sash Window Refurbishment?
Wooden sliding sash window refurbishment is repairing and restoring your existing windows to their former glory. It involves stripping back the paintwork, repairing any damage, and repainting or varnishing the wood. Sometimes, you may also need to replace rotten or damaged timber.
Why Refurbish Your Wooden Sliding Sash Windows?
You should refurbish your wooden sliding sash windows for several reasons. Firstly, it’s a great way to improve the appearance of your home without having to replace your windows entirely. This can be a more cost-effective option than buying new windows, and it’s also less disruptive since there’s no need for any significant building work.
Refurbishing your windows can also help to improve their energy efficiency. By filling in any gaps or cracks and ensuring that they fit snugly in their frames, you can help to prevent draughts and heat loss. This can make your home more comfortable and help reduce your energy bills.

How Much Does Wooden Sliding Sash Window Refurbishment Cost?
The cost of wooden sliding sash window refurbishment will vary depending on the condition of your windows and the extent of the work required. However, as a general guide, you can expect to pay between £50 and £100 per window.
What are sash windows?
A sash window has one or more movable panels, or “sashes,” that slide up and down or side to side inside the frame. These come in several materials, e.g. aluminium and PVC, but mainly wood.
Sash windows are popular in many older homes because they are relatively easy to repair and maintain. However, they can be prone to drafts and leaks if not properly sealed and maintained. Therefore, when considering refurbishing your sash windows, you must know what you’re getting into before you start.
What are the benefits of refurbishing?
- Improving the look of your home: Sash windows can add a lot of character to a property, and by refurbishing them, you can help to restore or enhance their appearance.
- Making your home more energy efficient: Older sash windows can be draughty and let in a lot of cold air, but by refurbishing them, you can help to improve their insulation and make your home more energy efficient.
- Reducing noise pollution: If your sash windows are old and poorly fitted, they can let in a lot of noise from outside. Refurbishing them will help to reduce the amount of noise that comes into your home.
- Saving money: Refurbishing your sash windows can be cheaper than replacing them altogether, adding value to your property.
How much does it cost?
The cost of refurbishing sash windows will depend on several factors, including the type and condition of the windows, the extent of the work required, and the contractor you choose. Expect to pay anywhere from £500 to £5,000 for a complete refurbishment. If your sash windows are in good condition, a simple refresh may be all that’s needed.
Involving stripping and repainting frames, replacing broken or damaged glass, and adjusting the sashes, so they open and close smoothly. Expect to pay around £250-£350 per window for this level of work. However, it will require more extensive work if your windows are in poor condition. Including repairing or replacing rotten woodwork, resetting loose glass panes, and rebuilding crumbling plasterwork.
Why choose wooden sash windows?
Wooden sash windows are popular for many homeowners because they offer several benefits. First, they are durable and can last many years with proper care. Second, they are easy to maintain and repair. Third, wooden sash windows add a touch of elegance and charm to any home. Finally, you can customise wooden sash windows to match the style of any home.
What is the process of refurbishing?
The process can be daunting but worth the effort. You will need to remove all the old paint or varnish from the window frames, sand them down, and then repaint or varnish them. You may also need to replace some of the hardware on the windows, such as the pulleys or weights. The entire process can take several days, but it is well worth it.
Step 1: Assessing the condition of your sash windows.
The first step in any sash window refurbishment project is to assess the condition of your windows. This will help you determine what work needs doing and how much it will cost. There are a few things you should look for when assessing your windows:
- Cracks or gaps in the wood – These can let in draughts and water, which can damage the window further.
- Rot or decay – This is a common problem with older windows and can cause the window to collapse if left unchecked.
- Loose or broken glass – This is a safety hazard and leads to draughts and water damage.
- Broken or missing sashes – Sashes are the movable parts of the window, and if they are damaged or missing, the window will not function properly.
Step 2: Draftproofing your sash windows.
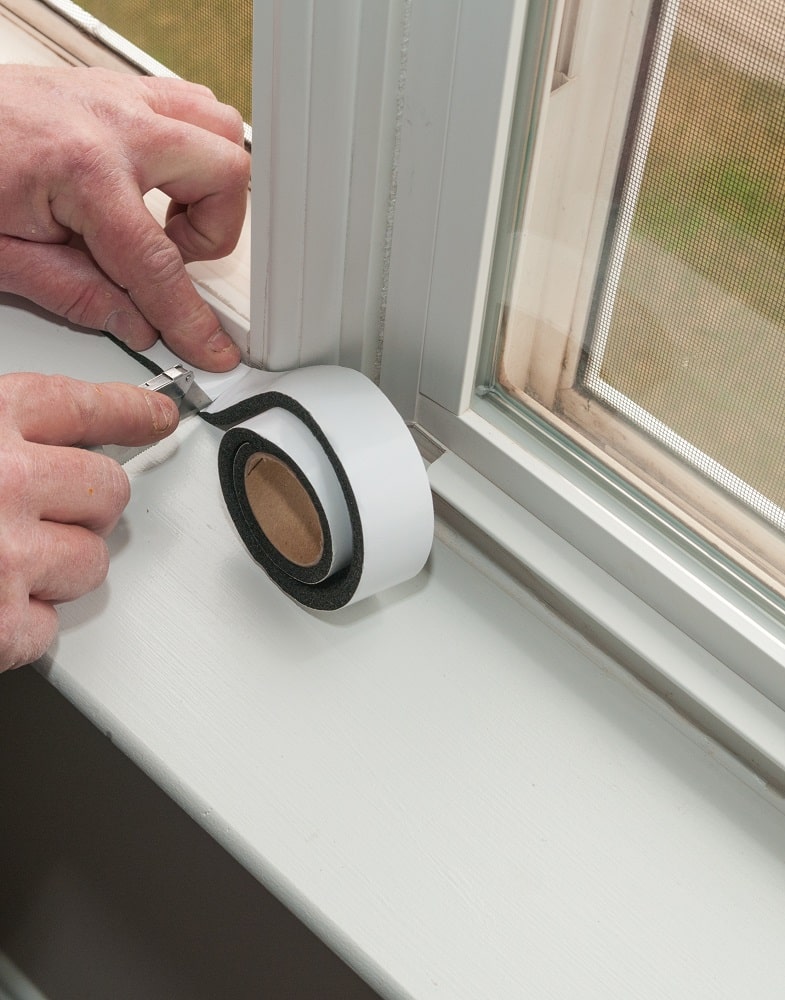
If you have old, single-glazed sash windows in your home, they are probably draughty and let in a lot of cold air. You can improve the situation by draught-proofing them. This will not only make your home more comfortable but will also save you money on heating bills. There are a few different ways to draught-proof sash windows. You can install new seals around the edges of the window or fit brush strips to the bottom of the sashes. You can also fit secondary glazing, an extra pane of glass fitted inside the existing window.
Installing new seals or brush strips is a relatively simple job that you can do yourself. Secondary glazing is a bit more complex and will require the help of a professional. But it is worth it, as it will make a big difference to the comfort of your home.

Step 3: Replacing or repairing rotten wood.
If your window is wooden, checking for rot before beginning any repair or replacement project is essential. Rotten wood is one of the leading causes of drafts and leaks in sliding sash windows. So, addressing this issue as soon as possible is vital.
There are a few ways to tell if your window has rotten wood. First, take a look at the frame and sill. If you see any cracks, holes, or flaking paint, there’s a good chance that the wood is rotted. Another way to tell is by tapping on the wood with a screwdriver or other hard object. If the wood sounds hollow, it’s likely rotted. Once you’ve determined that your window has rotten wood, you’ll need to replace or repair it. Replacing the entire frame and sill is usually the best option, but if only a few pieces are rotted, you may get away with repairing them.
To repair rotten wood, remove all the paint or varnish from the affected area. This will give you a better idea of how much damage has been done and where you need to focus your repairs. Next, use a chisel and hammer to remove loose or damaged wood. Once you’ve cleared the rotten wood, use epoxy or another strong adhesive to glue new pieces of wood into place. Be sure to sand, paint, or varnish the repaired areas before reinstalling the window.
Replacing rotten wood is more involved than repairing it, but it’s often necessary if the damage is extensive. Remove the entire frame and sill from the window opening to replace the rotten wood. Next, measure and cut new pieces of wood to fit into the opening. Be sure to use treated lumber or rot-resistant wood for this project. Once your new frame and sill are in place, add weatherstripping around all four sides of the window to help seal out drafts. Finally, install new glass panes and hardware as needed.
Step 4: Painting or staining your sash windows.
Wooden sash windows can be painted or stained to achieve the desired look. Depending on the wood type, paint or stain can highlight the grain or provide a smooth, solid colour. Painting is generally the cheaper option as it requires less preparation than staining. However, it is essential to use high-quality paint designed for exterior use to ensure longevity.
Staining can be more expensive as it often requires specialised equipment and products. It can also be more time-consuming as the wood must be sanded before application. However, staining can provide a richer and more natural look to the wood.
Step 5: Re-hanging your sash windows.
After your sash windows have been completely repaired and restored, it’s time to re-hang them. This process is relatively simple, but a few things to keep in mind are, ensuring that your windows are hung correctly.
First, ensure the bottom sash is slightly higher than the top sash. This will allow the window to open and close smoothly. Next, use a level to check that the window is level before attaching it to the frame. Once the window is level, use screws or nails to secure it.
Finally, check that the window opens and closes smoothly. If it doesn’t, make any necessary adjustments until it does. With a bit of care and attention, your newly refurbished sash windows should provide you with years of trouble-free use.
Tips for maintaining your refurbished sash windows
- Keep an eye on the weather. If you know a storm is brewing, close your windows to prevent damage.
- Inspect your windows regularly for any signs of wear and tear. If you notice any cracks or chips, repair them as soon as possible to avoid further damage.
- Make sure to clean your windows regularly, inside and out. This will help them look their best and prevent any build-up of dirt and grime.
How often should I refurbish my sash windows?
Most sash window refurbishment companies recommend that your windows be refurbished every 10-15 years. This can depend on the type of wood used, the level of maintenance and the environment the windows are located. For example, if your windows are in a particularly dry or sunny area, you may need to have them refurbished more frequently.
Can I do the work myself, or do I need to hire a professional?
If you are considering refurbishing your wooden sliding sash windows, it is essential to consider whether or not you will need to hire a professional. There are a few things to remember when making decisions, for example, windows condition and expertise level.
If your windows are in good condition and you feel confident in completing the work, you can do the work yourself. However, if your windows are in poor condition or you need more confidence in completing the work, it is best to hire a professional. Hiring a professional will ensure that the job is done correctly and that your windows are protected from further damage.
What are the building regulations for refurbishing sash windows?
There are no specific building regulations for refurbishing sash windows, but they should follow general guidelines. The first step is to assess the condition of the existing windows and determine if they can be repaired or replaced. If the windows are in good condition, they can repair by sanding down the wood, filling any cracks or holes, and repainting or staining the wood. If the windows are in poor condition, they will need to be replaced. The next step is to choose the type of window you want to install. There are many different types of sash windows available on the market, so it is essential to research and select the window that best suits your needs. Once you have selected the type of window you want to install, you will need to measure the opening and order the window from a supplier. The window will then need to be installed by a qualified tradesperson.

What is the difference between double-glazed and triple-glazed sash windows?
There are two main types of glazing for sash windows:
- Double-glazed sash windows – have two panes of glass, with a layer of air or gas in between to insulate them.
- Triple-glazed sash windows – have three panes of glass with two layers of insulation.
Triple-glazed windows are more energy efficient than double-glazed ones. However, they are also more expensive.
My house is listed – can I still refurbish my sash windows?
If your house is listed, you will need permission from your local authority before doing any work on your sash windows. Listed buildings are protected by law, and any changes need to be approved. When choosing a company to carry out the work on your sash windows, it is vital to choose one that is experienced and reputable. You can ask friends and family for recommendations or look for reviews online. It is also a good idea to get several quotes from different companies before making a decision.
Conclusion
If you’re thinking about refurbishing your sash windows, we highly recommend seeking professional help to ensure the job is done properly. Not only will this save you time and money in the long run, but it will also give you peace of mind knowing that your windows are in good hands.
Frequently asked questions about refurbishing sash windows
1. How much does it cost to refurbish a sash window?
2. What are the benefits of refurbishing a sash window?
3. How long does it take to refurbish a sash window?
4. What should I do if my sash window requires repair?


